 Recall
How to transcribe in Microsoft Word: Transcribe vs. Dictate, and what works on a Mac
To transcribe in Word, use Transcribe for recordings and audio files, and Dictate to write by speaking. Steps, which versions of Word support it, the 300-minute monthly limit, what to do on a Mac, fixes when it doesn’t work, and how to get meeting audio into text.
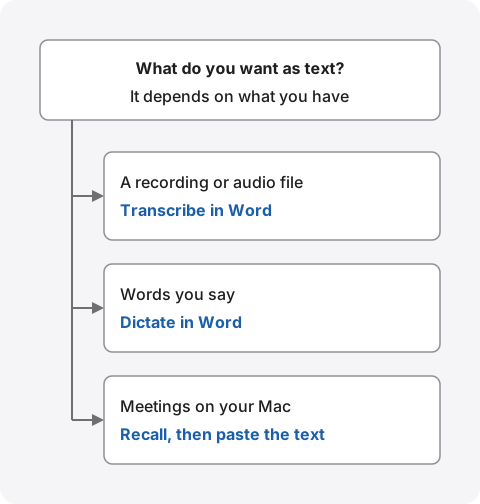
The short answer: Transcribe for recordings, Dictate for writing as you speak
To turn a recording or audio file into text in Word, use Transcribe. To put the words you say straight into a document, use Dictate. Both start from the Dictate button on the Home tab, and Transcribe sits in the menu under the arrow next to it.
According to Microsoft’s help, Transcribe works in Word for Microsoft 365 on Windows (business, or “commercial tenant”, accounts) and in Word for the web (Microsoft Edge or Chrome). The desktop Word app for Mac isn’t listed, so on a Mac you open Word for the web in Chrome or Edge. With a Microsoft 365 subscription, you can transcribe up to 300 minutes of uploaded audio a month.
Dictate is in Word for Windows and Mac, and Microsoft also has guides for Word for the web and Word Mobile. It needs a Microsoft 365 subscription. This article is written by KOROMO K.K., which develops Recall, a transcription app for Mac. We include our own product, so read with that in mind. We checked the Word details against the original Microsoft Support pages on November 10, 2026.
How Transcribe and Dictate differ
Transcribe turns a recording or audio file into text split by speaker, while Dictate types what you say at the cursor as you speak. The names are similar and they start from the same button, so they are easy to mix up.
| Transcribe | Dictate | |
|---|---|---|
| What it turns into text | Audio you record there, and audio files (.wav, .mp4, .m4a, .mp3) | Your own voice into the mic |
| Where the text goes | A pane on the right, with times and speakers; you choose what to add | Straight in at the cursor |
| Good for | Interviews, in-person meetings, recorded meetings | Writing notes and drafts by voice |
| Which Word | Windows and the web | Windows, Mac, the web and mobile |
If you want meeting notes from a recording, use Transcribe. Dictate will also turn voices into text if Word is open during a meeting, but it doesn’t split speakers, and it expects you to speak punctuation and line breaks. It isn’t made to write down other people talking.
How to transcribe with Transcribe
You open Transcribe from Home › the arrow next to Dictate › Transcribe, then either record there or upload an audio file. The steps follow Microsoft’s help article Transcribe your recordings.
Record and transcribe on the spot
- Sign in to Microsoft 365, open Word, and choose Home › Dictate › Transcribe
- In the Transcribe pane on the right, choose Start recording. The first time on the web, allow your browser to use the microphone
- When the mic button is outlined and the time starts moving, you’re recording. Keep the pane open until you finish. You can pause and resume
- When you’re done, choose Save and transcribe now. The recording is saved to OneDrive and transcription starts
For online calls, the help says not to use your headset. Transcribe picks up sound through the microphone, so the other people’s voices need to come out of your speakers and into the mic.
Upload an audio file
- In the Transcribe pane, choose Upload audio
- In the file picker, choose the audio file you want to transcribe
- Keep the pane open until transcription finishes
Supported formats are .wav, .mp4, .m4a and .mp3. How long it takes depends on your connection, and the help says it can take about as long as the audio. According to Apple’s help, iPhone Voice Memos exports recordings as .m4a by default, so you can move the file to your computer and upload it as is.
Add it to the document and rename speakers
The transcript isn’t added to the document automatically. Choose Add all to document for the whole thing, or Add section to document on a paragraph for just that part. Speakers appear as “Speaker 1”, “Speaker 2” and so on. Select Edit transcript section to change a label to a name, and select Change all Speaker [x] to rename that speaker everywhere at once.
If you share the document, others can’t play the audio in the Transcribe pane. The help describes this as the default to protect privacy. To let them listen, share the audio file separately.
Supported apps, plans and limits
Transcribe works in Word for Windows and Word for the web, and a Microsoft 365 subscription covers up to 300 minutes of uploaded audio a month. Here are the conditions in Microsoft’s help.
| Transcribe | Notes | |
|---|---|---|
| Word for Microsoft 365 on Windows | Supported for business accounts | Government accounts: web only. Optional connected experiences must be on |
| Word for the web | Supported | New Microsoft Edge and Chrome only. Needs an internet connection |
| Desktop Word for Mac | Not listed in the help | On a Mac, open Word for the web in Chrome or Edge |
Windows is the only desktop app listed, so on a Mac the way in is Word for the web. Its supported browsers are Edge and Chrome only, which leaves out Safari.
Limits: 300 minutes of uploaded audio a month
The limit applies to transcribing uploaded audio. With a Microsoft 365 subscription it’s 300 minutes a month, and with a Microsoft Copilot license it’s 30,000 minutes a month. The help gives no limit for recording on the spot. It also doesn’t say whether Transcribe works in free Word for the web without a subscription, so if it isn’t available to you, check your Microsoft 365 plan.
Languages and speakers
Transcribe works in more than 80 locales, including English and Japanese. Speakers are split automatically but shown as numbers, not names. Read the transcript through to check the split before you use it for meeting notes.
Where the audio goes and what is kept
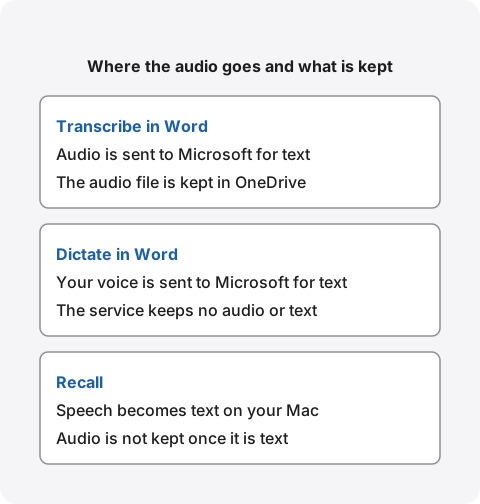
With Transcribe, the help says your audio files are sent to Microsoft and used only to provide the service. Once transcription is done, the audio and results aren’t stored by the service. The audio file itself, though, whether recorded or uploaded, is saved to the Transcribed Files folder in your OneDrive. Delete it there when you no longer need it.
Dictate also sends your voice to Microsoft to turn it into text, but the Dictate help article says the service doesn’t store your audio data or transcribed text.
Before you transcribe a work meeting in Word, check whether your company allows sending meeting audio to a cloud service, and tell the other people that you’re transcribing. If they say no, stop. This is the same for every tool, Recall included. We list what to check in What to check if you worry about leaks from AI meeting notes.
How to write by speaking with Dictate
Dictate types what you say at the cursor once you open a document, press Home › Dictate and wait for the button to turn on. It needs a Microsoft 365 subscription.
- Sign in to Microsoft 365 and open a document on a Mac or PC with a microphone
- Press Home › Dictate. In Word for Mac you can also start with Option + F1
- When the button turns on and it starts listening, speak
- Press the button again to stop. On Windows, resume with Alt + ` or the mic in the floating menu
Punctuation and line breaks
Say punctuation out loud, such as “comma”, “period” and “new line”. The gear in the Dictate toolbar lets you choose the spoken language and the microphone, and turn Auto Punctuation on or off. Auto Punctuation only appears when it’s available for the language you chose.
Fix and format by voice
There are commands to delete the last word or the last thing you said, and to add formatting or comments by voice. The full list is in the help. There’s also a setting that masks potentially sensitive phrases with ***.
What to check when it doesn’t work
If the button is missing, check sign-in and your subscription. If the mic doesn’t work, check permissions. If other people’s voices aren’t picked up, check your headset. These are the causes in the two help articles, most common first.
- You can’t find Transcribe: desktop Word for Mac isn’t listed. Open Word for the web in Chrome or Edge. On Windows, it only appears in Word for Microsoft 365 with a business account. In the desktop app, also check that optional connected experiences aren’t turned off
- The Dictate button is missing: make sure you’re signed in with an active Microsoft 365 subscription. Office 2016 and 2019 for Windows can’t dictate without Microsoft 365. You also need Windows 10 or later
- The button is grayed out: check that the document isn’t read-only
- “We don’t have access to your microphone”: make sure no other app or page is using the mic, refresh, then allow the browser to use it. For the Mac app, allow Word in System Settings › Privacy & Security › Microphone
- Online call voices aren’t picked up: if you listen through a headset or earphones, other people’s voices don’t reach the mic. To record with Transcribe, play them through speakers
- An audio file won’t upload: check that it’s .wav, .mp4, .m4a or .mp3, and that you haven’t used up the month’s 300 minutes
- Accuracy is poor: use a stable connection, cut background noise and speak clearly. A different microphone can help
Transcribe meetings on a Mac and paste into Word
If you have online meetings on your Mac every day, it takes less effort to turn them into text another way and paste into Word only when you need to. Transcribe in Word needs you to start a recording for each meeting and play the other people through your speakers.
For Teams meetings, start with Teams
Teams meetings can be transcribed with Teams’ own feature. Who can start it and where it’s saved are in How to transcribe Microsoft Teams meetings. If you want the meeting as an audio file to upload to Word, we explain how to record internal audio on a Mac in How to record internal audio on a Mac.
Transcribe with Recall, then paste the text
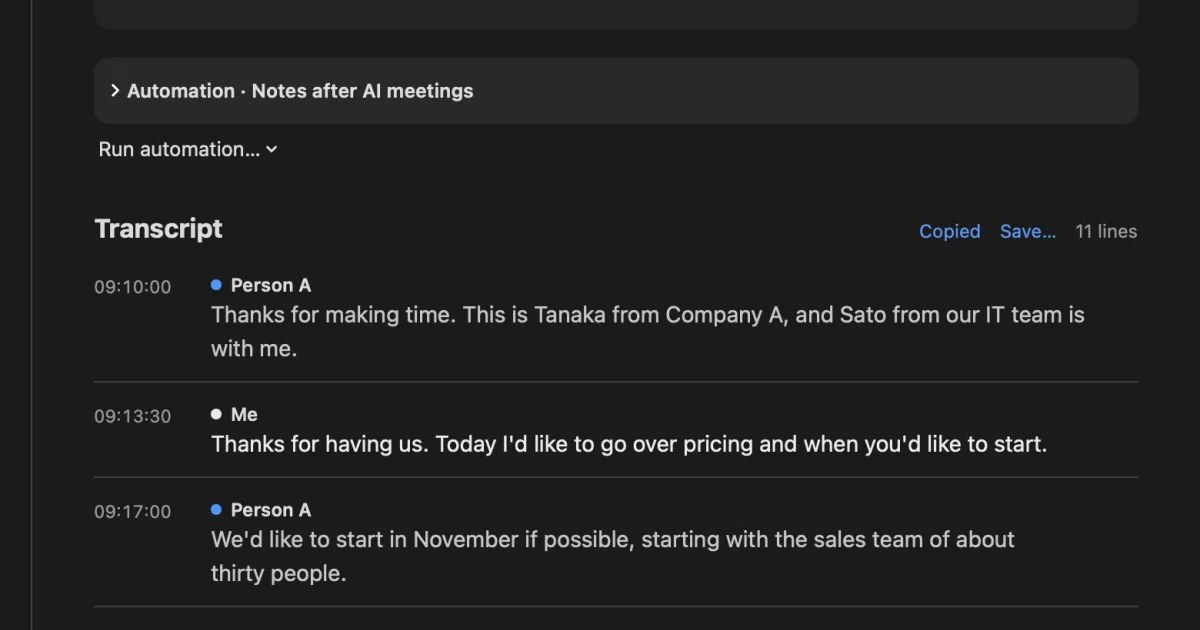
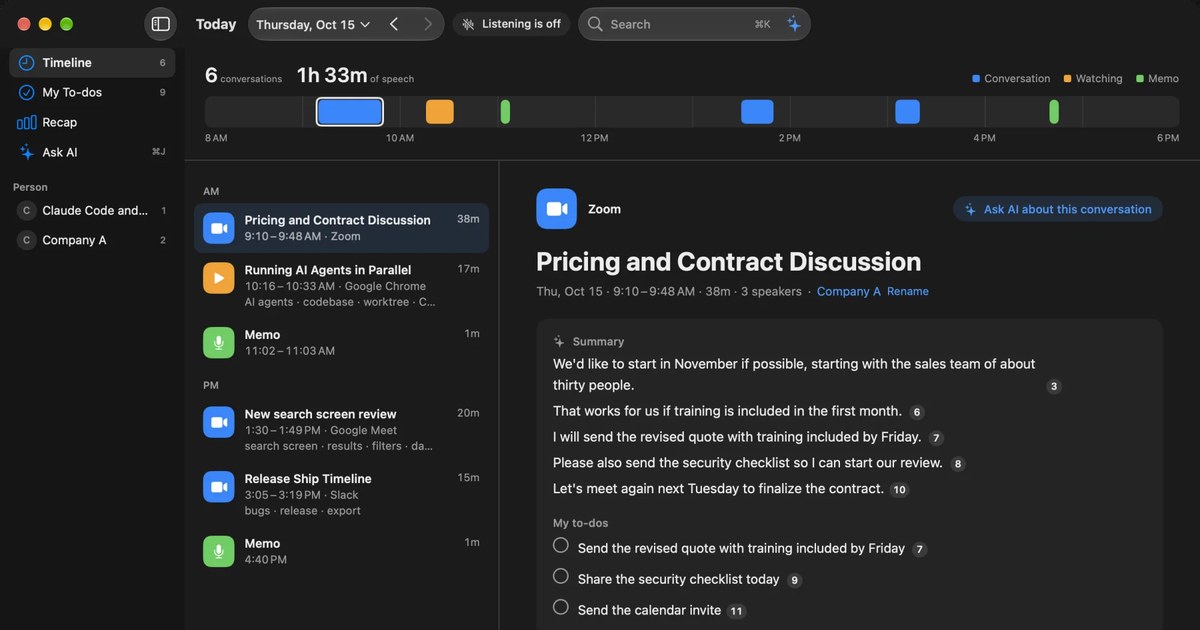
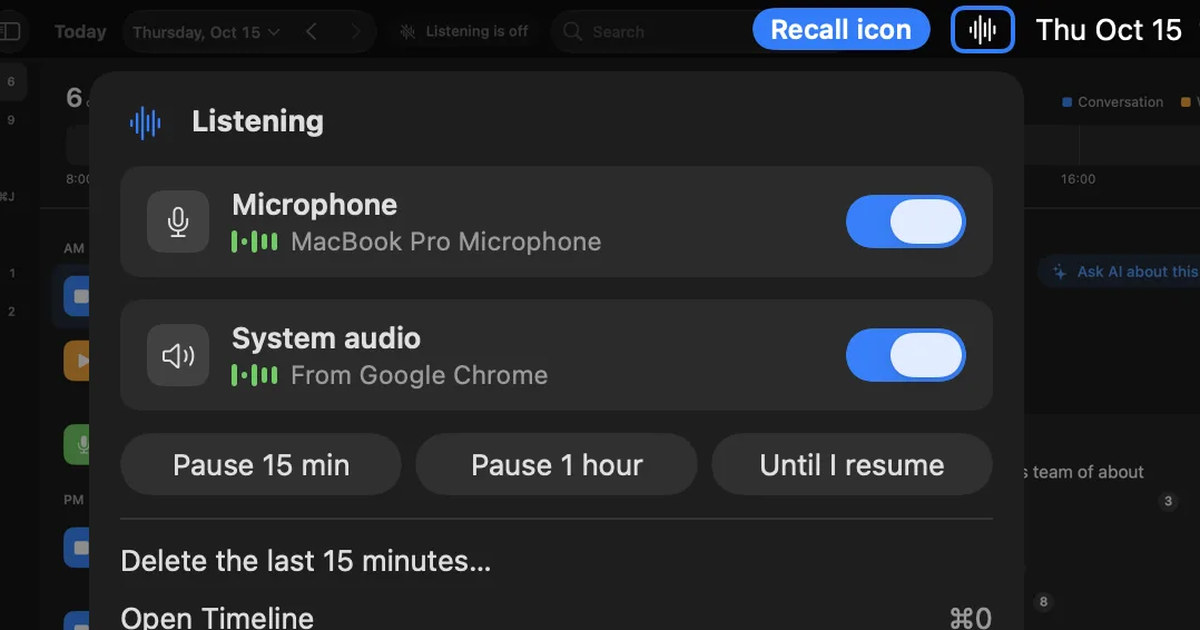
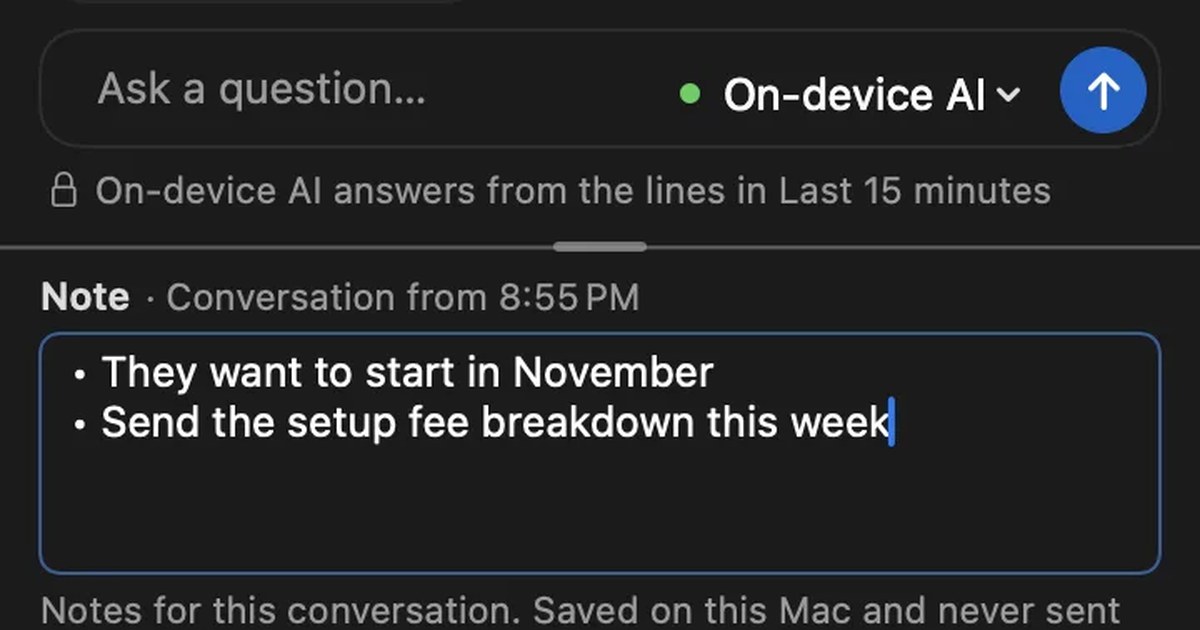
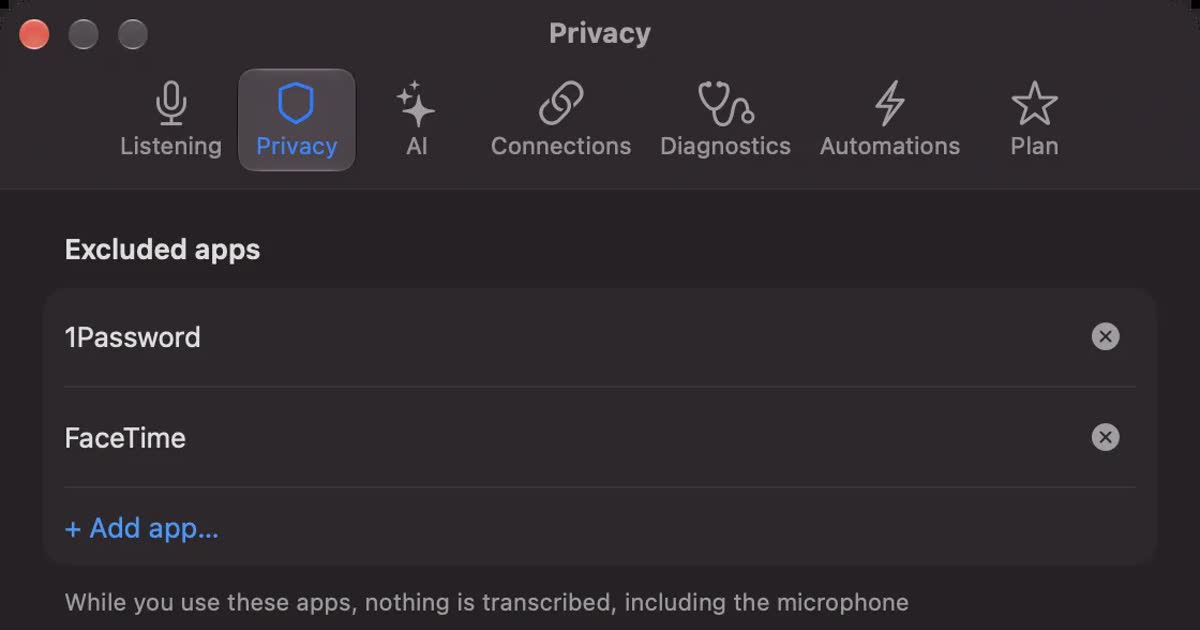
Recall lives in the menu bar and uses on-device AI to turn your mic and the sound your Mac plays (the other people in meetings and videos) into text. There’s nothing to start for each meeting, and it transcribes the other people even when you listen through earphones. Audio is discarded once it’s text and isn’t sent off your Mac.
For each conversation, Copy puts the transcript on the clipboard, and Save… saves it as a text file (.txt). It contains the title and date, then one line per remark as “time speaker: text”. Copy and save work in Free too. Paste it into Word and all that’s left is adding headings or tables to make meeting notes.
Recall can’t import recordings, so to transcribe a recording you already have, use Transcribe in Word or an app that transcribes on your Mac. We compare those apps in How to transcribe locally on a Mac.
Because Recall runs all the time, pause it from the menu bar before conversations you don’t want kept. Telling the other people that you’re transcribing is the same as with Word.
Who Recall is and isn’t for
Recall suits people with many meetings on a Mac who want to stop starting a recording each time and paste only the conversations they need into Word. If you just want to transcribe one recording, Transcribe in Word is the better fit.
Recall is for you if
- You want to stop starting a recording for every meeting
- You want the other people transcribed while you wear earphones
- You want meeting audio turned into text without sending it off your Mac
- You want to search many days of conversations in one place
- You use a Mac with Apple silicon on macOS 26 or later
Free to use · No account needed · macOS 26 or later · Mac with Apple silicon · By downloading, you agree to the Terms of Service
Recall isn’t for you if
- You want to transcribe recording files (Recall can’t import them)
- You want to keep recordings to listen again (audio isn’t kept once it’s text)
- You want text written straight into a Word document (Recall hands it over by copying or as a text file)
- You want to use it on Windows or iPhone
- You want a team to share the same records
What Free includes and how long records are kept
Free has no transcription limit and shows and searches the last 14 days. Records are kept for 90 days by default on Free and indefinitely on Pro, and older records are deleted. Pro is ¥980 a month or ¥9,800 a year (tax included), and if the license can’t be checked for 14 days in a row, Pro features stop. Recall listens in Japanese or English, and needs permission for the microphone, plus Screen Recording and System Audio Recording.
FAQ
Is transcription in Word free?
In the help we checked on November 10, 2026, Dictate needs a Microsoft 365 subscription. The Transcribe limit is described for people with a subscription (300 minutes a month), and the help doesn’t say whether free Word for the web can use it.
Can I use Transcribe in Word for Mac?
Desktop Word for Mac isn’t listed in the help. On a Mac, open Word for the web in Chrome or Microsoft Edge. Dictate does work in Word for Mac.
Is there a time limit for Transcribe?
Uploaded audio is limited to 300 minutes a month with a Microsoft 365 subscription, and 30,000 minutes a month with a Microsoft Copilot license. The help gives no limit for recording on the spot.
Which languages does it support?
Transcribe works in more than 80 locales, including English and Japanese. Dictate supports many languages too, and you choose the spoken language from the gear in the Dictate toolbar.
Does it tell speakers apart?
Transcribe labels speakers as “Speaker 1”, “Speaker 2” and so on, and you can rename them afterwards. Dictate doesn’t separate speakers.
Can I transcribe an iPhone voice memo in Word?
Voice Memos exports recordings as .m4a by default, so move the file to your computer and upload it with Upload audio in the Transcribe pane. Uploads count toward the 300-minute monthly limit.
Can I transcribe a Teams meeting in Word?
If you play the other people through speakers instead of a headset, Transcribe can record it. But Teams has its own transcription, which may be easier depending on how your meetings are set up.
Can I get Recall’s transcripts into Word?
Use Copy on a conversation and paste into Word, or Save… to a text file and open it in Word. Both work in Free. Recall can’t import recording files.
Checked on November 10, 2026. The Word details are based on the original Microsoft Support pages “Transcribe your recordings” and “Dictate your documents in Word”, and the Voice Memos detail on Apple’s iPhone User Guide. Features, supported apps and limits can change. Check Microsoft’s latest pages before you rely on them. The Recall details are based on our published help and pricing pages.
The differences between Recall Free and Pro are in Plans and license.
Free to use · No account needed · macOS 26 or later · Mac with Apple silicon · By downloading, you agree to the Terms of Service
Get the product overview (PDF) by email →
Related articles
How to transcribe an audio file on a Mac: m4a and mp3 options compared
To turn an m4a or mp3 file into text on a Mac, the first question is whether the audio may leave your Mac. MacWhisper, Transcribe in Word for the web, Gemini and ChatGPT compared by format, length limit and what you pay, plus whether Notes and Voice Memos can read files and what to check when it fails.
How to transcribe Microsoft Teams meetings: who can start it, where it saves, and Mac options
Three ways to transcribe a Teams meeting: the built-in feature, cloud services and apps on your Mac. Covers who can start it, why the button is missing, where transcripts are saved, and how to choose.
How to record internal audio on a Mac: macOS 27’s built-in option, BlackHole and OBS
On macOS 27 or later, a Mac can record internal audio with built-in screen recording. Steps for BlackHole and OBS on earlier Macs, what to check when there is no sound, and an option if you don’t need audio.
How to use voice typing in Google Docs: steps, punctuation, and fixes
Start voice typing in Google Docs from Tools › Voice typing. Which browsers work, how punctuation commands work, the limits for recordings, videos and meeting audio, voice typing on your phone, and what to check when it doesn’t work.
Is Otter.ai safe? Five checks for any AI meeting notetaker, with official answers
Is Otter.ai safe, and is any AI notetaker? Five checks (audio storage, where processing happens, AI training, sharing, telling participants), how to verify each, and what Otter, Notta, Rimo Voice, Granola and tl;dv officially say (checked November 13, 2026).